
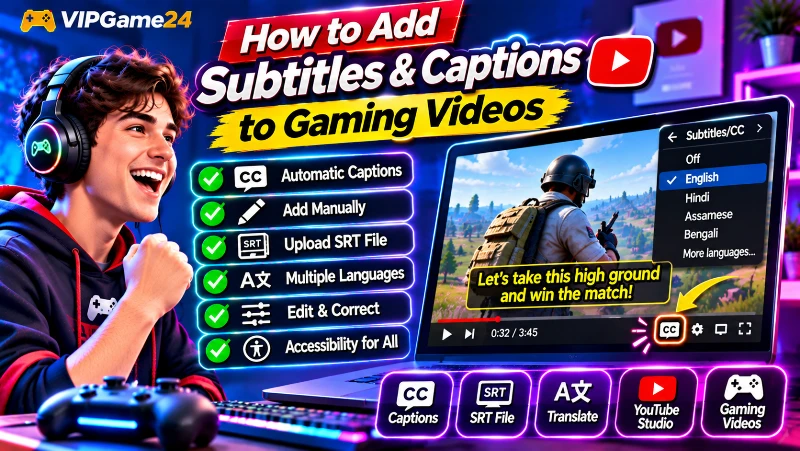
Gaming videos often contain fast gameplay, team conversations, character dialogue and important sound cues. When viewers cannot hear the audio clearly or understand the language, they may miss important information. Subtitles and captions make your content easier to follow and help more people enjoy your videos.
Learning how to add subtitles to gaming videos is useful for walkthroughs, tutorials, live-stream highlights, gameplay commentary and YouTube Shorts. You can create captions manually, use YouTube’s automatic speech recognition, upload an SRT file or prepare subtitles using video editing software.
This guide explains the difference between subtitles and captions, how to create and upload them through YouTube Studio, how to correct automatic captions and how to make gaming subtitles clear and readable.
Why Subtitles and Captions Matter for Gaming Videos
Subtitles and captions help viewers understand the spoken content of a video. They are particularly useful for people who are deaf or hard of hearing, viewers who speak another language and people who watch videos in places where they cannot turn on the sound.
For gaming creators, captions can also explain important gameplay conversations, identify speakers and make tutorials easier to follow.
Adding subtitles and captions can help you:
- Make gaming content more accessible to deaf and hard-of-hearing viewers.
- Help viewers understand commentary when the audio is difficult to hear.
- Make tutorials and walkthroughs easier to follow.
- Reach viewers who speak different languages through translated subtitles.
- Communicate important dialogue and sound information.
- Improve the viewing experience when people watch without sound.
Captions are not a replacement for clear audio or good editing. They are an additional way to communicate what happens in your video.
Subtitles vs Captions: What Is the Difference?
Subtitles and captions are related, but they are not always used for exactly the same purpose.
Subtitles
Subtitles usually display spoken dialogue as text. They may also translate the spoken language into another language so that viewers can understand the conversation.
For example, an English gaming tutorial could have Hindi, Bengali or another language subtitle track for viewers who prefer reading in that language.
Closed captions
Captions provide text for spoken dialogue and may also include relevant sound information that viewers need to understand the video.
For a gaming video, useful caption examples include:
- [Explosion]
- [Engine revving]
- [Team voice chat]
- [Character laughs]
- [Victory music]
These descriptions can help viewers understand important audio events even when they cannot hear them.
Selectable captions vs burned-in subtitles
There are two common ways creators display subtitles in gaming videos.
Selectable subtitle tracks: These are added through YouTube Studio. Viewers can turn them on or off using the captions control when the video supports captions. You can also provide multiple language tracks.
Burned-in subtitles: These are text elements permanently included in the video picture during editing. They remain visible whenever the video plays and are often used in short-form gaming clips.
Both methods have different uses. A selectable caption track offers viewer control and supports separate languages. Burned-in text gives you more control over the visual design, but viewers cannot switch it off.
For accessibility, a useful approach is to provide an accurate selectable caption track. You can also use designed on-screen captions when they improve the presentation.
How to Add Automatic Captions to Gaming Videos
YouTube can use speech recognition technology to generate captions automatically for eligible videos. This can save time when you record gameplay commentary, tutorials or conversations.
How automatic captions work
After you upload a video, YouTube may process its audio and generate captions in the video’s default language when automatic captioning is available.
The process uses machine learning, so the result may not be perfect. Game names, player usernames, character names, technical terms, accents and background noise can cause mistakes.
For example, a gaming commentator might say the name of a weapon or character that the speech recognition system does not recognize correctly.
Check whether automatic captions are available
After your video has finished processing:
- Sign in to YouTube Studio.
- Select Subtitles from the left-side menu.
- Choose the video you want to review.
- Look for the automatically generated subtitle track.
- Open the available caption editing option.
- Review the text and correct any mistakes.
Automatic captions may not be available immediately after uploading. Processing time depends on the video’s audio and other conditions.
Why automatic captions can contain errors
Automatic captioning can struggle when:
- The game audio is louder than the microphone.
- Several people speak at the same time.
- Commentary contains unusual game terminology.
- The speaker has an accent or uses unfamiliar pronunciation.
- Background music or sound effects cover the dialogue.
- The recording has poor audio quality.
Always check automatically generated captions before treating them as a finished transcript.
How to Add Subtitles Manually in YouTube Studio
YouTube Studio provides a manual subtitle editor. You can type or paste text while watching your video and create a caption track without preparing a separate subtitle file.
Step-by-step instructions
- Open YouTube Studio.
- Select Subtitles from the left-side menu.
- Choose the gaming video you want to edit.
- Click Add language and select the language of your subtitles.
- Under the Subtitles section, select Add.
- Choose Type manually.
- Play the video and enter the dialogue or captions as it happens.
- Pause playback when necessary to type accurately.
- Review the timing and text.
- Select Publish when the caption track is ready.
This method is suitable for shorter videos or recordings where you want complete control over the captions.
Include important sound descriptions
When creating captions manually, include important non-speech audio information where it helps viewers understand the event.
For example:
- [Door opens]
- [Gunfire]
- [Crowd cheering]
- [Victory sound]
- [Background music fades]
You do not need to describe every minor sound effect. Focus on audio information that contributes to understanding the scene.
How to Upload an SRT Subtitle File to YouTube
If you create subtitles using an editor or a dedicated captioning tool, you can upload a subtitle file directly to YouTube Studio.
One of the most common subtitle formats is SubRip, which uses the .srt file extension. YouTube also supports formats such as SubViewer (.sbv). For basic SRT files, YouTube requires plain UTF-8 text without unsupported styling markup.
Step 1: Prepare your subtitle file
Create a subtitle file containing the text and timestamps for each caption. The timestamps determine when a line appears and disappears.
A simple SRT example looks like this:
1
00:00:01,000 --> 00:00:04,000
Welcome back to the gaming channel!

2
00:00:04,500 --> 00:00:07,500
Today, we are playing a new challenge.

3
00:00:08,000 --> 00:00:11,000
Let's see if we can win this match!

4
00:00:12,000 --> 00:00:14,000
[Gunfire]

5
00:00:15,000 --> 00:00:18,000
That was an unexpected victory!
Save the file using the .srt extension and plain UTF-8 encoding.
Step 2: Open the subtitle section
- Sign in to YouTube Studio.
- Select Subtitles.
- Choose the video you want to caption.
- Select Add language.
- Choose the language used by your subtitle file.
- Under Subtitles, click Add.
Step 3: Upload the file
- Select Upload file.
- Choose With timing when your SRT file already contains timestamps.
- Click Continue.
- Select your subtitle file.
- Review the caption text and timing.
- Save or publish the subtitle track.
Choose Without timing when you have a transcript that still needs to be synchronized with the video.
How to Use Auto-Sync for Subtitles
YouTube’s Auto-sync option allows you to provide a transcript and lets the platform synchronize the text with the video’s speech.
This is useful when you already have an accurate transcript but do not have timestamps for each caption.
Auto-sync workflow
- Open YouTube Studio and select Subtitles.
- Choose the video and select Add language.
- Click Add under the Subtitles section.
- Select Auto-sync.
- Enter or paste the transcript in the language spoken in the video.
- Allow YouTube to process the transcript and synchronize it.
- Review the resulting captions.
- Correct any timing or transcription problems.
- Save and publish the track.
The transcript should match the spoken language of the video. YouTube does not recommend this method for videos longer than an hour or recordings with poor audio quality.
How to Create Clear and Readable Gaming Captions
Accurate text is only one part of good subtitles. Captions should also be easy to read while the viewer is watching fast-moving gameplay.
Keep caption lines short
Avoid displaying long paragraphs across the screen. Divide dialogue into smaller phrases that viewers can read comfortably while following the game.
For example, instead of displaying a complete long sentence at once, divide it into two or more natural sections while preserving the meaning.
Choose readable fonts and colours
Use a clear font that remains visible against different game environments. White text with a dark outline or a subtle background can help maintain contrast.
Avoid decorative fonts that make words difficult to recognize. Keep the same basic caption style throughout the video.
Choose suitable caption placement
Do not place subtitles over important gameplay elements such as health bars, maps, player names or objective indicators.
For landscape videos, the lower part of the frame is a common caption position, but you should adjust it when the game interface occupies that space.
For vertical gaming videos, check the preview carefully. Keep captions clear of important gameplay details and interface controls.
Keep captions on screen long enough to read
Captions should appear in synchronization with the spoken words and remain visible long enough for viewers to read them. Avoid making lines flash rapidly or disappear before viewers can finish reading.
Identify different speakers
Multiplayer gaming videos often contain several people talking through voice chat. When the speaker is not obvious, identify the person in the captions.
For example:
PLAYER 1: Watch the enemy on the left!

PLAYER 2: I see them!

PLAYER 1: Move behind the wall!
This helps viewers follow team conversations and understand who is speaking.
Captions for Gaming Shorts and Vertical Videos
Short-form gaming clips often have a different editing style from long gameplay videos. Captions can help communicate a quick joke, important reaction, tutorial step or gameplay objective.
Keep text away from important interface areas
Vertical video interfaces may display buttons, descriptions and other controls around the screen. Position your designed captions so they do not clash with important gameplay information or platform interface elements.
Use short phrases
A gaming Short often focuses on a single moment. Use concise captions that explain or emphasize that moment without distracting from the action.
Examples include:
- One Chance Left!
- Final Round
- Unexpected Victory
- Watch the Last Second
- That Was Too Close!
These are designed text overlays, not replacements for a complete caption track when one is needed for accessibility.
Consider both burned-in text and caption tracks
Burned-in subtitles can match the visual style of a Short, while a separate caption track allows viewers to use selectable captions where supported.
Decide what each version is intended to achieve. If you rely only on decorative text overlays, viewers may not be able to switch captions off or select a translated track.
How to Add Multiple Languages to Gaming Videos
Gaming videos can reach viewers who speak different languages. YouTube Studio allows creators to add subtitle tracks in multiple languages for eligible uploads.
Add another subtitle language
- Open YouTube Studio.
- Go to Subtitles.
- Select the video you want to update.
- Click Add language.
- Choose the additional language.
- Click Add under the Subtitles section.
- Upload a translated subtitle file, use Auto-sync where appropriate or enter the subtitles manually.
- Review the translation and timing before publishing.
Translate gaming terms carefully
Some game names, character names, item names and technical terms should remain unchanged. Other expressions may need translation to make sense to local viewers.
Review automated translations carefully. Literal translations can sometimes change the meaning of jokes, instructions or gaming expressions.
Prioritize the languages your audience uses
Check your channel analytics and audience information before preparing many subtitle languages. Start with languages that are relevant to the viewers you are trying to reach.
Accurate subtitles in a few useful languages are better than publishing many poorly reviewed translations.
Common Subtitle and Caption Mistakes to Avoid
Publishing automatic captions without checking them
Automatic speech recognition can misunderstand game terminology, usernames and accents. Always review the transcript, especially when the video includes fast commentary or noisy gameplay.
Using captions that cover important gameplay
Large captions can hide the game interface or important action. Adjust the placement and text size so the content remains visible.
Displaying too much text at once
Long caption blocks are difficult to read while following fast gameplay. Break the dialogue into shorter, natural sections.
Ignoring sound information
When an important game sound communicates what happened, captions may need a brief sound description. This can be particularly helpful for viewers who cannot hear the original audio.
Using incorrect subtitle timing
Captions that appear too early or remain visible after the speaker finishes can make a video confusing. Review the timing from beginning to end.
Relying only on decorative text
Large animated words can look attractive in a gaming Short, but they do not necessarily provide a complete transcript. Use a selectable caption track when viewers need accurate dialogue and sound information.
How to Check and Edit Existing YouTube Captions
You do not need to upload a completely new video every time you find a caption mistake. YouTube Studio allows creators to edit caption text and timing.
Edit an existing caption track
- Open YouTube Studio.
- Select Subtitles.
- Choose the video with the captions you want to edit.
- Find the relevant language track.
- Select Edit under the Subtitles section.
- Choose a caption line and correct the text.
- Adjust its timestamps when necessary.
- Review the complete track and select Publish.
For automatically generated captions, YouTube provides a Duplicate and edit option so that you can make a corrected version of the track.
Review the complete video
Check the entire video rather than correcting only the obvious mistakes. Look for incorrect names, missing dialogue, timing issues, overlapping lines and important sound descriptions.
Pay particular attention to the opening and ending, where captions may sometimes be missing or incorrectly synchronized.
Frequently Asked Questions
How do I add subtitles to a gaming video on YouTube?
Open YouTube Studio, select Subtitles, choose your video and add a language. You can then upload an SRT file, use Auto-sync, type the captions manually or review an available automatic caption track.
Can YouTube generate subtitles automatically?
Yes. YouTube can automatically generate captions for eligible videos using speech recognition. The accuracy varies depending on audio quality, pronunciation, accents, background noise and other factors. Review and correct the captions before relying on them.
What is the best subtitle format for YouTube?
SubRip (.srt) is a practical choice for creators who are new to subtitle files. YouTube also supports SubViewer and other caption formats. Basic SRT files should use plain UTF-8 text with timestamps.
Can I add captions in more than one language?
Yes. You can add multiple language tracks through YouTube Studio. Each language can have its own subtitle file or manually prepared captions.
Should I burn subtitles into my gaming videos?
Burned-in subtitles are useful when you want complete control over the visual appearance, particularly in short-form clips. However, they cannot be switched off by viewers and do not provide the same language-selection flexibility as separate subtitle tracks.
Do captions help deaf and hard-of-hearing viewers?
Yes. Accurate captions can communicate dialogue and relevant sound information that may otherwise be missed. They make gaming content more accessible to deaf and hard-of-hearing viewers.
Can I edit automatic subtitles after publishing a video?
Yes. Open YouTube Studio, select Subtitles and choose the video. You can edit the existing caption track, correct the text, change its timing and publish the updated version.
Final Thoughts
Subtitles and captions can make gaming videos easier to understand and more accessible to a wider audience. Whether you create long gameplay sessions, tutorials, multiplayer highlights or Shorts, accurate captions help communicate important dialogue and sound information.
Start with YouTube’s automatic captions when they are available, but always review them for errors. Use an SRT file or manual editing when you need more control over the text and timing. For viewers who speak other languages, consider adding translated subtitle tracks that match your audience.
Most importantly, keep your captions readable, correctly synchronized and clear of important gameplay details. A little attention to subtitles can make your gaming content more welcoming and easier to enjoy.