
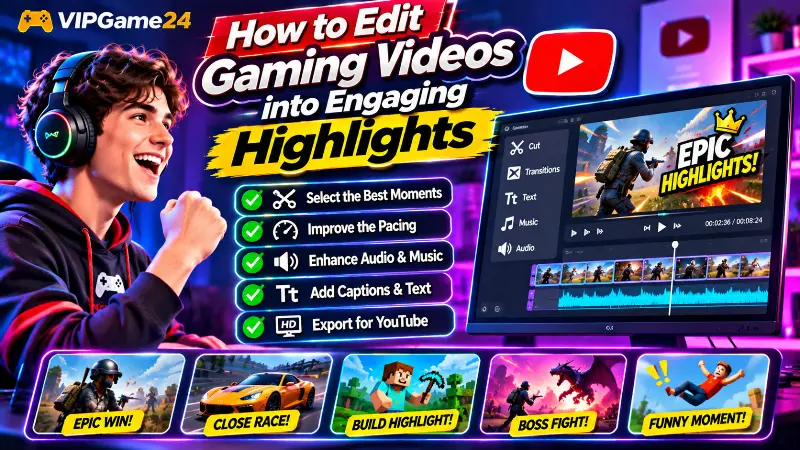
Recording a gaming session can capture exciting victories, funny mistakes, difficult challenges and unexpected moments. However, a long recording does not automatically make an entertaining YouTube video. Viewers usually want to see the most interesting parts without sitting through unnecessary waiting, repeated attempts or long stretches of unedited gameplay.
Learning how to edit gaming videos into engaging highlights can help turn ordinary gameplay recordings into more enjoyable videos. Good editing is not about adding effects to every second. It is about selecting the right moments, arranging them into a clear sequence, improving the audio and removing anything that slows down the experience.
Whether you create action game highlights, funny multiplayer moments, racing compilations or competitive gameplay videos, this guide will help you build a practical editing workflow.
Why Editing Matters for Gaming Videos
Gaming recordings often contain a mixture of exciting and less interesting moments. A match might include several minutes of waiting, loading screens, unsuccessful attempts and quiet gameplay before the main action begins.
Editing helps you separate the important moments from the background footage. You can create a video that is easier to follow and gives viewers a reason to continue watching.
Effective gaming video editing can help you:
- Remove unnecessary waiting and repetitive gameplay.
- Highlight exciting victories, close matches and surprising events.
- Make longer recordings easier to watch.
- Improve sound quality and balance game audio with commentary.
- Add captions, labels and context where needed.
- Create a consistent visual style for your gaming channel.
Good editing does not require complicated effects or expensive equipment. A clear sequence, suitable pacing and understandable audio are often more important.
Choose the Right Gaming Moments Before Editing
The first step is selecting the footage worth keeping. Before opening your editing software, review your recordings and identify moments that contribute something interesting to the final video.
Look for exciting gameplay moments
For action and shooting games, useful highlights might include difficult victories, close escapes, impressive plays, unexpected encounters or successful team strategies.
For racing games, you could select dramatic overtakes, close finishes, unexpected crashes or challenging sections of a track.
In strategy and survival games, interesting moments might include important decisions, resource discoveries, boss battles or successful defensive moves.
Try to select moments that are understandable even to someone who has not watched the entire recording.
Include funny and unexpected moments
Not every highlight needs to be an impressive victory. Unexpected mistakes, unusual physics, funny teammate reactions and surprising game events can make entertaining gaming content.
Keep enough context around a funny moment so that viewers understand why it is amusing. Cutting too aggressively can remove the setup and make the event confusing.
Remove repetitive and unnecessary footage
Review the recording for sections that do not contribute to the story. Common examples include:
- Long loading screens and menus.
- Repeated attempts with no meaningful change.
- Unnecessary travel or waiting time.
- Long periods of silence without interesting gameplay.
- Technical problems and accidental recording interruptions.
Do not remove every quiet moment automatically. Some slower sections are important for explaining a strategy, building tension or giving viewers a break between intense sequences.
Organize Your Gameplay Footage
Organizing your recordings before editing can save time and reduce mistakes. This becomes particularly useful when you record long sessions or use multiple camera and audio sources.
Create folders for each project
Keep the files for each video in a separate project folder. A simple structure might look like this:
Gaming-Video-Project/
    Gameplay/
    Facecam/
    Microphone-Audio/
    Music/
    Sound-Effects/
    Screenshots/
    Project-Files/
    Exports/
Save original recordings separately from edited exports. This makes it easier to return to the source footage if you need to change the video later.
Rename and label important clips
Use clear names for useful clips rather than leaving every file with an automatically generated recording name.
For example:
- opening-gameplay
- first-boss-fight
- unexpected-victory
- funny-teammate-moment
- final-match
You can also maintain a simple list of timestamps while reviewing a long recording. This helps you locate important moments without searching through the entire file repeatedly.
Build a Strong Opening for Your Gaming Highlight Video
The beginning of a gaming video is important because viewers are deciding whether the content matches what they expected. Avoid spending too much time on lengthy introductions before showing something interesting.
Show a strong moment early
Consider starting with a short preview of an exciting event from later in the video. This could be a dramatic victory, a close escape, a difficult challenge or a funny moment.
After the preview, move into the story or gameplay sequence that explains how the event happened.
Introduce the video quickly
After the opening moment, give viewers enough context to understand the content. A short voice introduction or on-screen message can explain the game, challenge or main objective.
For example:
- “Today, I am trying to win using only starter weapons.”
- “This was our closest match of the entire session.”
- “I attempted the hardest level without using any extra lives.”
Keep the introduction connected to the actual gameplay. Viewers should not have to wait a long time before the main content begins.
Make the opening match the title and thumbnail
If your title promises an unusual challenge or a difficult victory, the opening should establish that subject. Avoid starting with unrelated footage that gives viewers the wrong impression.
YouTube’s audience retention guidance recommends reviewing the first 30 seconds and experimenting with different introductions. It also suggests moving compelling moments earlier when they appear much later in a video.
You can review this information in the YouTube Analytics content performance guide.
Improve the Pacing of Your Gaming Videos
Pacing describes how quickly information and events move through a video. Good pacing keeps the video easy to follow without making every moment feel rushed.
Remove unnecessary pauses
Trim long periods between important events. For example, a video showing several matches does not need every loading screen or every minute spent searching for an opponent.
Keep short transitions between sections so viewers can understand when a new match, challenge or objective begins.
Use cuts to maintain momentum
A simple cut is often enough to move from one gameplay moment to another. Clean cuts are usually more effective than adding a different transition to every clip.
Try to cut at natural points, such as the end of a battle, after a completed objective or when the focus changes to another player.
Use slower moments to build tension
Not every section should be fast. A quiet moment before a boss battle, an important strategic decision or a close racing finish can make the final result more exciting.
Preserve these moments when they contribute to the story. The goal is to remove unnecessary waiting, not to remove all breathing room.
Keep the sequence easy to follow
Arrange clips in a logical order. If a highlight depends on an earlier event, show enough of that event before presenting the result.
For example, a compilation of multiplayer highlights might follow this structure:
- A short preview of the best moment.
- A brief introduction to the match or challenge.
- The main gameplay highlights in sequence.
- The most exciting or important event.
- A short closing section.
This gives the video a simple structure instead of making it feel like a random collection of unrelated clips.
Use Transitions and Effects Without Overdoing Them
Transitions and visual effects can improve the flow of a highlight video, but too many effects can distract viewers from the gameplay.
Choose simple transitions
Use cuts for most gameplay sequences. A short fade can work when moving between separate matches, while a brief transition can help introduce a new chapter or section.
Keep transitions consistent. The viewer should focus on the game rather than noticing a different visual effect every few seconds.
Use zooms for important details
A controlled zoom can highlight a small detail, such as a player reaction, an important object or a particular gameplay action.
Do not zoom constantly. Excessive zooming can make footage difficult to follow and may reduce its visual quality.
Add slow motion selectively
Slow motion can emphasize a dramatic finish, a difficult trick, a close escape or an important gameplay achievement.
Use it only when it adds something to the moment. Slowing down ordinary gameplay can make a video feel unnecessarily long.
Use sound effects to support the action
Short sound effects can emphasize a successful hit, a surprising event or a transition. Keep them balanced with the original game audio.
Sound effects should support the moment rather than cover important gameplay sounds or dialogue.
Improve Game Audio, Commentary and Background Music
Audio quality has a major influence on how professional a gaming video feels. Even visually impressive gameplay can become difficult to watch when the microphone is unclear, the music is too loud or important game sounds are missing.
Balance game audio and microphone volume
When you record commentary, make sure your voice can be understood without completely hiding the game audio.
Listen to the recording using headphones and check for:
- Microphone distortion or clipping.
- Unwanted background noise.
- Game sounds that are too loud.
- Sudden changes in volume between clips.
- Silence or audio interruptions.
Apply moderate volume adjustments and noise reduction when needed. Avoid processing the voice so aggressively that it sounds unnatural.
Choose background music carefully
Background music can help establish the mood of a video. Energetic music may suit fast gameplay, while quieter instrumental music can work better for tutorials or strategic sections.
Keep music below important dialogue and gameplay audio. Lower the music during commentary or important in-game conversations when necessary.
Use music and sound effects that you have permission to use. YouTube’s Audio Library is one option for finding music and sound effects for videos. Always review the applicable usage and attribution requirements before including a track.
Visit the YouTube Audio Library help page for more information.
Keep audio consistent between clips
Different recordings may have different volume levels. Listen to the transitions between clips and adjust them so that viewers do not experience sudden jumps in loudness.
A consistent audio experience makes a compilation feel more polished.
Add Captions, Text and On-Screen Information
Text overlays can explain what is happening, identify a player or provide additional context. However, they should remain readable and should not cover important parts of the gameplay.
Use captions for spoken commentary
Captions help viewers follow dialogue and spoken explanations. They can also make videos more accessible to people who watch without sound or have difficulty hearing the audio.
Review automatically generated captions before relying on them. Correct game names, character names, technical terms and other words that may have been transcribed incorrectly.
Highlight important gameplay information
Short on-screen labels can explain a challenge, identify a game mode or show the current objective.
For example, a racing highlight might use a short label such as “Final Lap” or “Last Corner”. A strategy gameplay video could display the name of a mission or a key resource.
Keep text short and use a consistent font style. Avoid placing large blocks of text over the main action.
Use readable text on different screens
Many viewers watch gaming videos on mobile devices. Make sure captions and labels are large enough to read on a smaller screen.
Use strong contrast between text and the background. Check the final video on both a computer and a phone before uploading.
Choose a Suitable Video Editing Software
Your editing software should match your workflow, computer hardware and experience level. You do not need a complicated professional setup to create a good gaming highlight video.
When evaluating an editing program, consider these features:
- Timeline editing: The ability to arrange, cut and move multiple video and audio clips.
- Audio controls: Volume adjustment, audio trimming, fades and basic noise management.
- Text and captions: Tools for adding titles, labels and subtitles.
- Effects and transitions: Useful options for making visual changes without overcomplicating the video.
- Export settings: Control over resolution, frame rate, format and bitrate.
- Performance: Smooth playback and rendering on your available computer hardware.
Try an editing program with a sample recording before committing to a complete project. A simple workflow that runs smoothly on your computer is often more useful than a feature-heavy editor that struggles with your footage.
Recommended Editing Workflow for Gaming Highlights
Following the same basic process for every video makes editing more organized. You can adapt the steps to suit your game and the type of content you publish.
Step 1: Import and review your recordings
Bring the recorded gameplay, microphone audio and any additional footage into your editing project. Review the recordings and identify the most useful moments.
Step 2: Mark the best clips
Create a selection of highlights. Remove unusable recordings and note the order in which the important events should appear.
Step 3: Create a rough timeline
Place the selected clips on the timeline in a logical sequence. Focus on the overall story before adding effects, music or detailed text.
Step 4: Trim and improve pacing
Remove unnecessary pauses, long loading screens and repetitive gameplay. Keep enough context around important moments so the sequence remains understandable.
Step 5: Add commentary, music and sound effects
Balance the original game audio with microphone recordings and background music. Add sound effects only where they improve the experience.
Step 6: Add captions and visual details
Insert subtitles, short labels and useful on-screen information. Check that text does not cover important gameplay details.
Step 7: Watch the complete edit
Play the video from beginning to end. Look for awkward cuts, missing context, audio problems, repeated scenes and sections that feel too slow.
Step 8: Export and check the final file
Export the video using settings appropriate for your recording and publishing needs. Watch the exported file before uploading it to YouTube. Check both the beginning and the ending, along with a few sections throughout the video.
Export Settings for YouTube Gaming Videos
Export settings affect the quality and file size of your finished video. The best settings depend on the original recording, editing software and available hardware.
For a typical gaming upload, consider these general starting points:
- Video format: MP4 is a practical choice for general YouTube uploads.
- Video codec: H.264 is widely supported by editing software and playback devices.
- Resolution: Use the same resolution as your recording when it is suitable for your intended upload.
- Frame rate: Keep the exported frame rate consistent with the source footage when possible.
- Audio: Use a clean, compatible audio export and check that voice, game sounds and music are balanced.
For high-motion gaming footage, avoid using an unnecessarily low bitrate because it can cause visible compression. Follow the export recommendations provided by your editing software and compare the result before publishing.
See YouTube’s recommended upload encoding settings for its current technical guidance.
Common Gaming Video Editing Mistakes to Avoid
Making the introduction too long
A long animated logo or unrelated introduction can delay the main content. Keep channel branding brief and show viewers what the video is about early.
Adding too many effects
Frequent flashes, zooms, shake effects and transitions can make gameplay difficult to follow. Use effects to emphasize important moments rather than decorate every clip.
Using music that is louder than the gameplay
Background music should not hide commentary or important game sounds. Listen to the complete video with headphones and check volume changes between sections.
Cutting away important context
Removing too much footage can make an exciting event confusing. Keep enough of the setup, action and result for viewers to understand what happened.
Ignoring the final export
Do not assume that an export is perfect simply because the editing timeline looks correct. Review the final file for audio problems, missing frames, visual glitches and incorrect settings.
Using copyrighted music without permission
Do not assume that a popular song is safe to include just because it is available online. Use music that you own, have licensed or are otherwise permitted to use. Check the terms attached to each track before publishing.
Use YouTube Analytics to Improve Your Editing
After publishing, review the way viewers interact with your video. YouTube Analytics can help you identify which sections hold attention and which moments may need improvement in future edits.
Review audience retention
The audience retention report shows how well different moments hold viewers’ attention. It can highlight the introduction, top moments, spikes and dips when those insights are available.
Look for patterns rather than judging a video based on a single point. A section with a spike may have been especially interesting or may have required viewers to watch it again to understand what happened.
Find sections where viewers leave
Dips in the retention graph can indicate portions that viewers skipped or where they stopped watching. Review those moments and ask whether the editing was too slow, the explanation was unclear or the section repeated information.
Study your strongest moments
If a particular gameplay moment consistently holds attention, consider making similar content in future videos. For example, viewers may respond especially well to close victories, difficult boss fights or funny multiplayer interactions.
Compare similar video formats
A long gameplay compilation and a short highlight video may attract different viewing habits. Compare videos with similar formats and lengths rather than assuming every upload should perform in the same way.
For more information, see YouTube’s audience engagement reports.
You can also read our guide on improving YouTube watch time and subscribers for additional channel-growth ideas.
Frequently Asked Questions
How do I edit gaming videos for YouTube?
Start by selecting the best gameplay moments, arranging them into a clear sequence and removing unnecessary footage. Improve the audio, add captions where useful, review the complete edit and export the finished video using suitable settings.
How long should a gaming highlight video be?
There is no single ideal length for every gaming highlight video. The length should depend on the amount of interesting content and how well the sequence holds together. Remove unnecessary footage rather than adding scenes just to reach a particular duration.
Should I add background music to gaming videos?
Background music can improve the mood and energy of a video, but it is optional. Keep it at a suitable volume and use music that you have permission to include in your content.
How can I make gaming videos more entertaining?
Choose interesting moments, build a logical sequence, remove unnecessary pauses and use clear audio. Add commentary, captions or effects only when they improve the story or help viewers understand the gameplay.
Can I edit long gameplay recordings into multiple videos?
Yes. A long recording may contain several independent highlights, challenges or events. You can organize them into separate videos when each selection has enough context and a clear subject.
What is the most important part of gaming video editing?
Selecting the right footage and arranging it well are two of the most important parts. Effects and transitions cannot make an uninteresting sequence entertaining on their own. Start with good moments, then use editing to present them clearly.
Final Thoughts
Creating engaging gaming highlights starts long before you export the final video. Review your recordings carefully, choose moments worth sharing and arrange them into a sequence that viewers can follow. Remove unnecessary pauses, balance the audio and use captions or effects only when they add value.
Most importantly, review your finished videos and learn from audience retention data. Notice which moments viewers enjoy and which sections lose their attention. With a consistent workflow and thoughtful editing decisions, you can turn ordinary gaming recordings into more enjoyable content for your YouTube audience.