
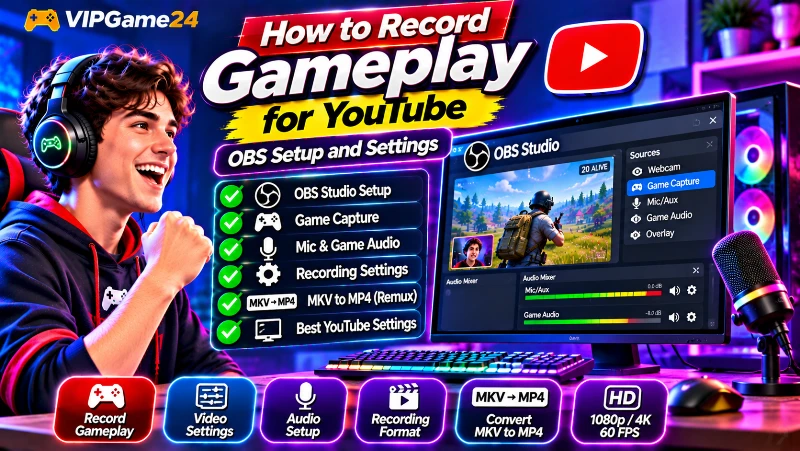
Recording your gameplay is the first step towards creating YouTube gaming videos. Whether you want to publish walkthroughs, tutorials, funny moments, competitive matches or gameplay highlights, a good recording gives you the original footage you need for editing.
However, recording a game is not simply a matter of pressing a button. You need to choose the right capture source, configure video and audio settings, select a suitable recording format and make sure your computer can handle the workload.
This guide explains how to record gameplay for YouTube using OBS Studio. It covers game capture, display capture, microphones, audio tracks, recording quality, file formats and practical troubleshooting tips for creating better gaming footage.
Why Use OBS Studio to Record Gaming Videos?
OBS Studio is free, open-source software for video recording and live streaming. It allows you to capture gameplay, desktop windows, webcams, microphones and other sources, then arrange them into scenes.
For gaming creators, OBS offers useful recording features:
- Game capture: Capture supported games directly on Windows.
- Display capture: Record the entire screen or desktop.
- Window capture: Record a selected application window.
- Audio mixing: Capture microphone and desktop or application audio.
- Multiple scenes: Create separate layouts for gameplay, tutorials and commentary.
- Recording controls: Choose a recording folder, format, encoder and quality settings.
- Webcam support: Add a camera to your gameplay recording when needed.
OBS is suitable for both beginners and experienced creators. You can start with a simple gameplay recording setup and add more advanced features as your channel develops.
Download it from the official OBS Studio website.
What You Need Before Recording Gameplay
Before installing OBS, check whether your computer and recording equipment are suitable for the games you want to capture.
A gaming computer or console
Your device needs to run the game and provide the video source for recording. When recording gameplay on a PC, the processor and graphics card handle the game and recording workload.
If your computer struggles to run the game smoothly, recording at a high resolution or frame rate may make the problem worse. Start with settings your hardware can maintain consistently.
A microphone for commentary
A microphone is useful when you want to explain gameplay, create tutorials or record reactions. You can start with a headset microphone and upgrade later.
Test the microphone before recording. Check that your voice is clear and that background noise, keyboard sounds and fan noise are not distracting.
Headphones
Headphones help you monitor game audio and microphone levels. They can also prevent speaker sound from being picked up again by the microphone.
Enough storage space
High-quality gameplay recordings can use considerable disk space. Make sure your recording drive has enough free storage before starting a long session.
Consider using a separate folder or drive for original recordings, edited projects and finished exports. This makes it easier to organize footage and manage storage.
Optional webcam or capture card
A webcam can show your face alongside gameplay. A capture card can bring video from an external console or another compatible device into OBS.
These accessories are optional. You can record PC gameplay without purchasing a webcam or capture card.
How to Install and Set Up OBS Studio
Start by downloading OBS Studio from its official website. Choose the version suitable for your operating system and complete the installation.
Run the Auto-Configuration Wizard
When OBS starts for the first time, you may be offered an Auto-Configuration Wizard.
- Open OBS Studio.
- Choose the Auto-Configuration Wizard when it appears.
- Select the option optimized for recording.
- Review the suggested video settings.
- Apply the configuration.
The wizard provides a starting point. It does not guarantee that every setting is ideal for your particular game or computer, so test your recording before using it for an important video.
Understand the main OBS interface
Several sections of the OBS interface are particularly important for gameplay recording:
- Scenes: Organize different recording layouts.
- Sources: Add games, displays, windows, microphones, webcams and other inputs.
- Audio Mixer: Monitor and adjust audio levels.
- Scene Transitions: Control transitions between scenes.
- Controls: Start recording, stop recording and access other actions.
You do not need to configure every feature immediately. Begin with one scene containing your game and microphone.
How to Add Game Capture in OBS Studio
Game Capture is designed to capture supported games directly. OBS identifies this source as a Windows-only option in its Quick Start Guide.
Add a Game Capture source
- Open OBS Studio.
- Go to the Sources panel.
- Click the plus (+) button.
- Select Game Capture.
- Give the source a name.
- Choose the appropriate capture mode.
- Select the game or application when using a specific-window option.
- Confirm the settings and check the preview.
For many Windows PC games, Game Capture is an efficient way to capture gameplay without recording the entire desktop.
Choose the correct game capture mode
OBS provides different capture modes depending on the game and the available capture method. The specific options can vary with the OBS version and operating system.
Start with the appropriate game capture option and check whether the game appears correctly in the preview. If it does not work, try Window Capture or Display Capture as an alternative.
Game Capture vs Display Capture vs Window Capture
Choosing the correct source can prevent black screens, unwanted desktop content and unnecessary recording of other applications.
Game Capture
Game Capture is designed to capture supported games directly on Windows.
Use it when:
- You are recording a supported PC game.
- You want to capture gameplay without showing the entire desktop.
- You want a dedicated source for the game.
Display Capture
Display Capture records everything visible on a selected monitor.
It can be useful when:
- The game does not work with Game Capture.
- You need to record a desktop tutorial.
- You want to show several applications on the screen.
Be careful when using Display Capture. It may also record private notifications, messages, browser tabs and other information visible on the desktop.
Window Capture
Window Capture records a selected application window rather than the entire display.
It can be useful for certain games, applications and software tutorials. Check that the correct window is selected and that the content appears properly in the preview.
OBS explains these source types in its official Quick Start Guide.
Set Up Microphone and Game Audio
Good audio is essential for gaming videos. Viewers should be able to hear your commentary and important game sounds without experiencing sudden volume changes or distracting background noise.
Configure your microphone
- Open OBS Settings.
- Select Audio.
- Find the Mic/Auxiliary Audio device setting.
- Choose the microphone you want to record.
- Apply the changes.
- Speak normally and check the Audio Mixer.
When you speak, the microphone meter should respond. If it does not move, check the selected device, operating system permissions and microphone connection.
Check desktop or game audio
OBS can capture desktop audio and, on supported configurations, audio from individual applications.
Check the Audio Mixer while playing the game. Make sure the correct audio source is active and that the game sounds can be heard in a test recording.
Balance microphone and game volume
Your commentary should remain understandable without making the game silent. Adjust the microphone and game audio levels while monitoring the recording through headphones.
Also check for:
- Microphone clipping or distortion.
- Background noise.
- Echo from speakers.
- Sudden volume changes.
- Game audio covering your voice.
Record separate audio tracks when useful
OBS supports multiple audio tracks in its recording settings. This can be useful when you want to keep your microphone and game audio separate for editing.
For example, you could record your voice on one track and game audio on another. This gives you more flexibility to adjust the levels during editing.
Check that your editing software supports the audio-track arrangement you choose. A test recording is important because selecting tracks incorrectly can result in missing audio in the final video.
For more information, see OBS’s application audio capture guide.
Configure Recording Quality and Video Settings
Your recording settings influence video clarity, file size and computer performance. The best settings depend on the game, recording resolution, frame rate and available hardware.
Choose your base canvas resolution
The Base (Canvas) Resolution determines the working size of your OBS scene. For a typical landscape gaming recording, 1920 × 1080 is a practical starting point when your game and display support Full HD.
If you record at a different display resolution, you can choose a suitable canvas and arrange the game source accordingly.
Choose the output resolution
The Output (Scaled) Resolution determines the dimensions of the recorded video.
Common choices include:
- 720p: A lower-resolution option for systems with limited resources.
- 1080p: A common choice for Full HD gaming videos.
- 1440p: Useful when you have suitable recording hardware and source footage.
- 2160p (4K): Requires more processing power, storage and editing resources.
For many creators, 1080p is a sensible starting point. Increase the resolution only when your computer can record and process the footage reliably.
Choose a suitable frame rate
Frame rate describes the number of video frames displayed each second.
- 30 fps: A practical option for many tutorials and slower-paced games.
- 60 fps: Often suitable for fast gameplay and competitive gaming footage.
Try to record at a frame rate that your game and computer can maintain. A stable 30 fps recording can be more useful than a 60 fps recording with frequent stuttering.
Select a suitable recording encoder
The encoder converts your gameplay into a video file. Depending on your hardware and OBS configuration, available choices may include a hardware encoder or a software encoder.
Hardware encoding can reduce the amount of encoding work performed by the CPU when supported by your graphics hardware. Software encoding uses the processor and can provide different quality and performance trade-offs.
There is no single best encoder for every computer. Test the available options with your actual game and compare the results.
Choose a recording quality preset
OBS provides recording quality options and advanced encoder settings. Higher-quality recordings generally require more storage and can increase processing demands.
Start with a high-quality setting that your hardware can handle. Record a short sample, review the image and check for dropped frames before choosing a setting for longer sessions.
Which Recording Format Should You Use: MKV or MP4?
The recording container determines how video and audio streams are stored together. Two common formats are MKV and MP4.
Why OBS recommends MKV for standard recording
OBS recommends MKV for many recording workflows because an unexpected interruption is less likely to make the entire recording unusable.
This is useful when recording long gameplay sessions. If OBS or the computer stops unexpectedly, the recording is less likely to lose the whole file because the recording was not finalized normally.
Convert MKV to MP4 using Remux Recordings
Some editing applications and workflows work more conveniently with MP4 files. OBS includes a Remux Recordings feature that can convert a completed MKV recording into a compatible MP4 container without requiring a complete video re-encode.
To remux a recording:
- Open OBS Studio.
- Select File from the top menu.
- Choose Remux Recordings.
- Browse for the MKV recording.
- Select the destination and start the remux process.
- Check the resulting MP4 file before editing or uploading.
OBS also provides an option to remux recordings to MP4 automatically after recording stops.
Consider fragmented MP4 when appropriate
OBS also provides fragmented MP4 and MOV recording options in supported configurations. These formats write the recording in sections and can remain playable after certain interruptions, although compatibility depends on the editing software and playback tools.
For a straightforward beginner workflow, standard MKV recording followed by remuxing to MP4 is a practical choice.
Read OBS’s Standard Recording Output Guide and Audio/Video Formats Guide.
Recommended YouTube Export Settings for Recorded Gameplay
Your local recording settings and final YouTube upload settings are related, but they are not necessarily the same. You may record a high-quality source file and export a smaller, platform-ready version after editing.
YouTube’s recommended upload settings include MP4 as the container, H.264 as a video codec and AAC-LC or other supported audio codecs. It also recommends uploading video at the same frame rate at which it was recorded.
Recommended SDR upload video bitrates
The following are YouTube’s published reference bitrates for SDR uploads:
| Resolution | 24–30 fps | 48–60 fps |
|---|---|---|
| 720p | 5 Mbps | 7.5 Mbps |
| 1080p | 8 Mbps | 12 Mbps |
| 1440p | 16 Mbps | 24 Mbps |
| 2160p (4K) | 35–45 Mbps | 53–68 Mbps |
These are recommended upload encoding bitrates, not mandatory OBS local recording settings. Your editing software may provide suitable export presets that use these recommendations.
Use suitable audio settings
YouTube recommends 48 kHz audio sampling for its upload encoding guidance. For stereo audio, its recommended AAC audio bitrate is 384 kbps.
Check the final export to make sure that commentary, game sounds and background music remain balanced.
See YouTube’s recommended upload encoding settings for the latest technical details.
How to Record Gameplay Step by Step in OBS Studio
Once your sources and settings are configured, follow a simple recording workflow.
Step 1: Create a gameplay scene
Open OBS and create a scene named Gameplay. Add your Game Capture source on Windows or the appropriate display or window capture source for your setup.
Step 2: Add your microphone
Select your microphone as an audio source. Check the Audio Mixer and speak normally to confirm the level is working.
Step 3: Check the game audio
Start the game and check that its sound is visible in the Audio Mixer. Confirm that OBS is capturing the correct application or desktop audio.
Step 4: Set the recording folder
Open Settings, select Output and find the Recording Path option. Choose a folder with enough free storage for your gameplay recordings.
Step 5: Choose the recording format and quality
Select a suitable format, encoder and quality option. For the beginner workflow described in this guide, MKV is a practical recording format.
Step 6: Record a short test
Click Start Recording, play for a few minutes and then select Stop Recording.
Step 7: Review the recorded file
Open the recording and check:
- Is the gameplay visible and correctly framed?
- Is the video smooth?
- Can you hear the game audio?
- Is your microphone clear?
- Are there any missing or distorted sections?
- Is the file saved in the correct folder?
Make adjustments before recording a full-length session.
Step 8: Record the complete gameplay session
When the test looks correct, start recording the full session. Keep an eye on available storage and OBS performance indicators.
How to Record Console Gameplay for YouTube
Console gameplay can also be recorded, but the setup depends on your console and the features available on it.
Use the console’s built-in recording feature
Many modern consoles provide built-in gameplay recording or video capture options. These are useful for saving short clips and sharing gameplay without a separate computer recording setup.
Check the console’s official documentation for its recording length, resolution and sharing limits.
Use a capture card with OBS
If you want more control over your console recording, you can connect a compatible capture card to a computer.
A typical setup involves:
- Connecting the console’s video output to the capture card input.
- Connecting the capture card output to a display when pass-through is supported.
- Connecting the capture card to the recording computer.
- Opening OBS Studio.
- Adding a Video Capture Device source.
- Selecting the capture card and checking the preview.
- Configuring the game audio and microphone.
- Running a short test recording.
Some capture cards have additional compatibility and audio-routing requirements. Follow the manufacturer’s instructions for the device you are using.
How to Record Gameplay Without Lag or Stuttering
Recording can affect game performance because your computer must run the game and encode video at the same time.
Close unnecessary applications
Shut down applications that are not needed during recording. Background programs may use CPU, GPU, RAM or disk resources.
Use hardware encoding when suitable
If your graphics hardware supports a suitable recording encoder, test it against software encoding. Hardware encoding may reduce CPU workload, although the exact quality and performance depend on your system.
Lower the recording resolution if necessary
If recording at 1440p or 4K creates performance problems, try 1080p. You can also reduce the output frame rate if the computer cannot maintain the selected setting.
Monitor OBS performance
Watch for rendering lag, encoding lag or other performance warnings. If these occur, review your game settings, capture sources and encoder configuration.
Record to a suitable storage drive
Saving large gameplay files to a slow or nearly full drive can create problems. Use a drive with enough free space and check whether the recording location can handle sustained writing.
How to Organize Your Gameplay Recordings
A recording folder can quickly become difficult to manage when you save many gameplay sessions. Use a consistent naming system and keep original files separate from edited projects.
Create a folder structure
Gaming-Content/
    Original-Recordings/
        Minecraft/
        Racing-Games/
        Shooting-Games/
    Microphone-Audio/
    Edited-Projects/
    Thumbnails/
    Final-Exports/
    Published-Backups/
Use clear recording filenames
Give your files useful names that identify the game and session.
Examples include:
- minecraft-survival-session-01.mkv
- racing-challenge-final-lap.mkv
- multiplayer-match-highlights.mkv
- boss-fight-gameplay-recording.mkv
Clear names make it easier to find the right source footage during editing.
Keep original recordings until your project is finished
Do not delete source footage immediately after exporting a final video. Keep original recordings until you are satisfied with the upload and no longer need to make changes.
After that, decide which recordings need to be archived and which can be removed to free storage.
Common Gameplay Recording Problems and Solutions
OBS shows a black screen
Check that you have selected the correct capture source. Try running the game and OBS with compatible permissions, and switch between Game Capture, Window Capture and Display Capture when necessary.
The microphone is not being recorded
Open Settings and check the selected microphone device. Confirm that the microphone is not muted and that the Audio Mixer shows activity when you speak.
The video is recorded without game audio
Check the desktop or application audio source. Some setups use separate audio sources, so verify that the game audio is enabled and included in the correct recording track.
The recording file is too large
Reduce the recording quality or resolution if the file size is impractical. You can also use a suitable encoder and quality setting to balance file size and image detail.
The recording looks blurry
Check the output resolution, encoder quality and source game resolution. If the game is recorded at a lower resolution and enlarged during editing, the result may look soft.
The gameplay stutters in the final recording
Check whether the game or OBS is overloaded. Reduce demanding graphics settings, lower the recording output or try a different encoder. Record another short sample before continuing.
Frequently Asked Questions
What is the best software to record gameplay for YouTube?
OBS Studio is a popular free option because it supports gameplay capture, audio mixing, multiple scenes and recording controls. You can also use built-in console recording features or capture software supplied with your gaming hardware.
Should I record gameplay in 1080p or 4K?
Choose a resolution your hardware can record consistently. 1080p is a practical starting point for many creators, while 4K requires more processing power, storage and editing resources.
Is 30 fps or 60 fps better for gaming videos?
60 fps can make fast gameplay look smoother when your hardware and source footage support it. 30 fps may be more suitable when recording resources are limited or the content does not require a higher frame rate.
Should I use MKV or MP4 in OBS?
OBS recommends MKV for many standard recording workflows because it is more resilient to unexpected interruptions. You can use OBS’s Remux Recordings feature to convert a completed MKV file into MP4 when required by your editing software.
Can I record game audio and my microphone separately?
Yes. OBS supports multiple recording audio tracks and suitable application-audio capture configurations. This allows you to keep game audio and microphone recordings separate when your setup is configured correctly.
Can I use OBS to record console gameplay?
Yes. With a compatible capture card connected to your computer, you can add the device as a Video Capture Device source in OBS. Some consoles also provide their own gameplay recording features.
How much storage space do gaming recordings need?
Storage requirements depend on recording resolution, frame rate, encoder quality, bitrate and duration. High-quality 1080p and 4K recordings can use several gigabytes per hour, so check your recording folder regularly.
Can I record gameplay and upload it directly to YouTube?
Yes, but you should review the recording first. Check the audio, video quality and file format. You may also want to edit the footage, add captions and prepare a suitable thumbnail before publishing.
Final Thoughts
Recording good gaming footage begins with a reliable capture setup and suitable OBS settings. Choose the right game or display source, configure your microphone and game audio, select a recording format and test the results before starting a long session.
For many creators, 1080p recording at a stable frame rate is a practical starting point. Use MKV when following OBS’s standard recording workflow, then remux to MP4 if your editing or upload process requires it.
Most importantly, record a short test and review the actual file. Once your setup is reliable, you can focus on creating tutorials, walkthroughs, challenges and gameplay highlights for your YouTube audience.